
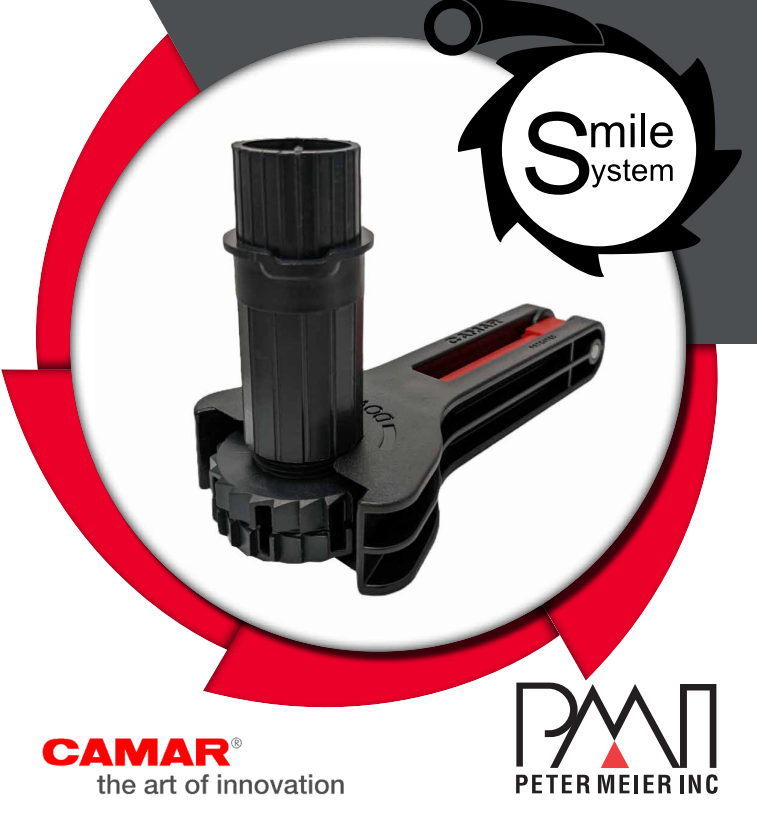
The Peter Meier Smile Cabinet Leveling System helps cabinet installers level base cabinets faster, make precise height adjustments, and avoid the hassle of shimming uneven floors.
Developed by Camar and offered by Peter Meier Inc., the system uses adjustable cabinet legs, mounting sockets, and a ratcheting tool to make leveling easier from the front of the cabinet.
To build a complete Smile System, you need three core components:
- Mounting Sockets
- Leveling Legs
- Adjustment Tool
Add an extension handle to reach rear legs and compatible toe kick clips to secure a removable toe kick.
Each component serves a different purpose. This guide explains what to buy, how the parts work together, and how to choose the right setup for your cabinet installation.
Quick Skim: Peter Meier Smile System Components
| Component | What It Does | What to Order |
|---|---|---|
| Mounting Sockets | Secure leveling legs to the cabinet bottom | One compatible socket per leg |
| Smile Leveling Legs | Support the cabinet and adjust its height | One leg per support point, matched to the required height |
| Adjustment Tool | Raises or lowers legs with a ratcheting motion | At least one per installation crew |
| Extension Handle | Extends the tool’s reach to rear and corner legs | One per crew when deeper access is needed |
| Toe Kick Clips | Attach removable toe kick panels to the leveling legs | Match the clip to the toe kick material and mounting method |
Key Specifications:
- Load Capacity: 330 lbs. per leveler with a compatible socket
- Height adjustment: 1 inch per Smile leveler
- Material: High-impact ABS plastic
- Available Leg Heights: 3-3/4 inches to 6-3/4 inches, depending on model
- Tool Operation: 180-degree reversal for raising or lowering legs
- Best Applications: Frameless kitchen cabinets, bathroom vanities, closets, garage cabinets, and other base cabinetry
1. Mounting Sockets: The Foundation of the Smile System
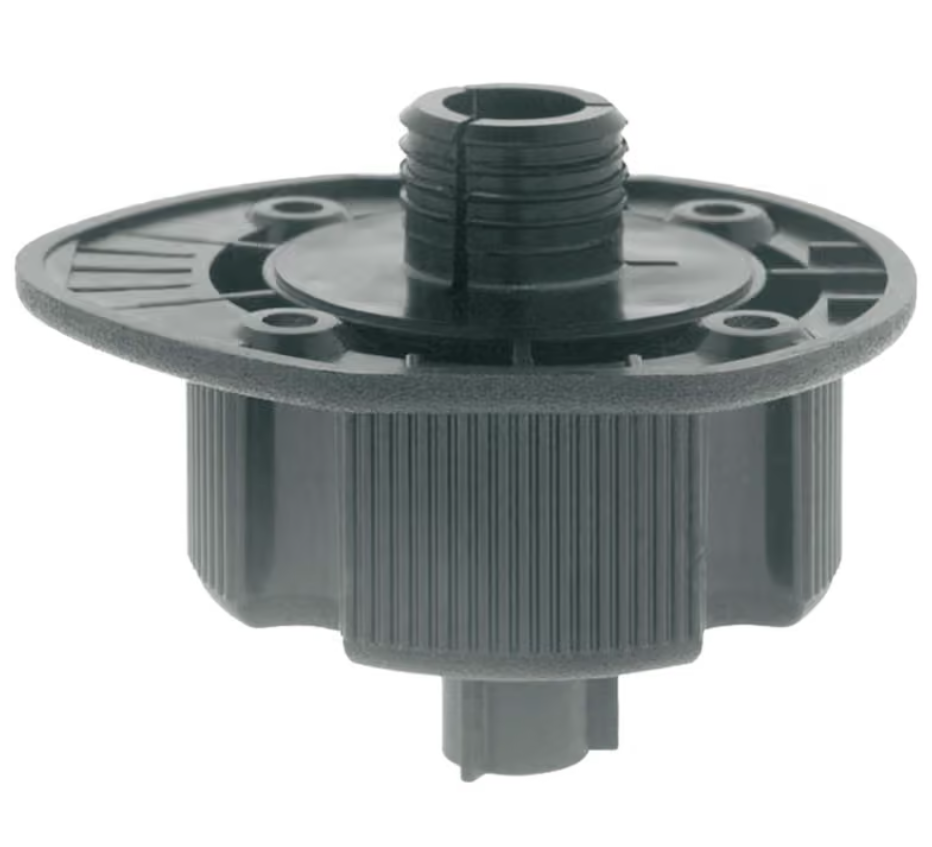
The mounting socket connects the Smile leveling leg to the bottom of the cabinet. It holds the leg in place and helps transfer the cabinet’s weight through the leg to the floor.
You need one compatible mounting socket for every leveling leg.
Peter Meier offers several ABS plastic socket styles. The right choice depends on your cabinet construction, drilling setup, and preferred mounting method.
Which Smile System Socket Should You Choose?
| Socket Type | Peter Meier Part Number | Best For |
|---|---|---|
| Wood screw mount | 840-H5-P2 | Shops that want a straightforward screw-mounted connection |
| 10mm dowel mount | 840-10-P2 | Production shops using 10mm predrilled mounting holes |
| 15mm dowel mount | 840-15-P2 | Shops using 15mm dowel mounting patterns |
| Hollow bolt mount | 840-00-R1 | Installations that call for a secure hollow-bolt connection |
| 35mm knock-in mount | 840-F5-00 | Cabinets prepared for a 35mm knock-in socket |
The 10mm and 15mm dowel sockets use a V-plate design for added support. The hollow bolt version provides a strong mechanical mounting option.
For shops with CNC drilling or repeatable production processes, matching the socket to the existing hole pattern can help reduce extra installation steps.
Shop Mounting Sockets:
Installation Tip: Mount Sockets in the Shop
Peter Meier recommends installing sockets during cabinet production rather than waiting until the jobsite.
Mount the sockets before shipping and pack the leveling legs separately with each cabinet. At installation, crews can insert the legs, position the cabinet, and begin leveling.
Preinstalled sockets can also serve as protective contact points while handling or positioning cabinets before the legs are inserted.
This approach reduces jobsite assembly work and helps protect finished cabinet panels.
2. Smile Leveling Legs: Choose the Right Height and Load Capacity
The Smile leveling leg supports the cabinet and gives installers control over its final height.
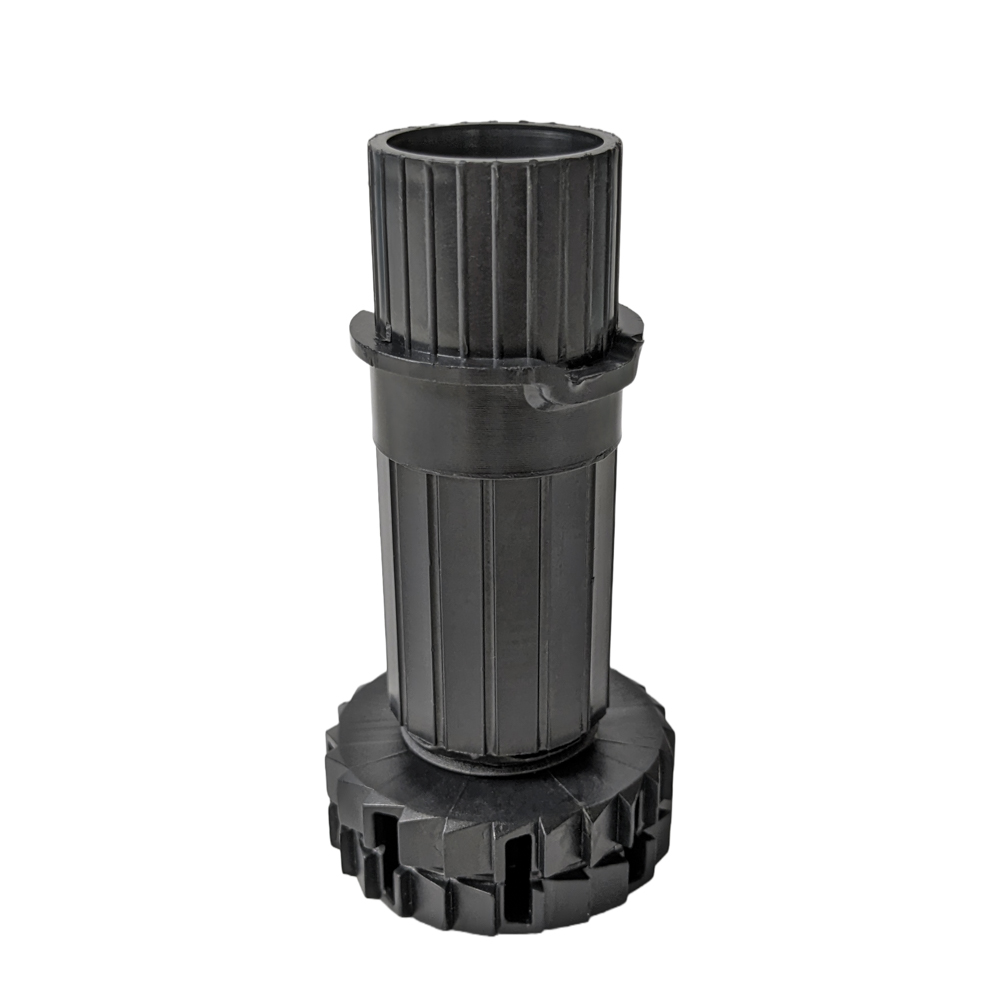
Each leveler has a two-piece design with a black ABS shaft and a specially designed foot. The foot engages the Smile adjustment tool, allowing installers to raise or lower the cabinet without turning each leg by hand.
The levelers support up to 330 lbs. each when paired with the correct socket and offer 1 inch of total height adjustment.
Smile System Leveling Leg Sizes
| Model | Adjustable Height Range | Typical Buying Consideration |
|---|---|---|
| 450-10-TT | 3-3/4″ to 4-3/4″ | Standard 4-inch toe kick designs |
| 450-11-TT | 4-1/8″ to 5-1/8″ | Cabinet designs requiring a slightly taller base |
| 450-12-TT | 4-1/2″ to 5-1/2″ | Mid-height base clearances |
| 450-13-TT | 4-7/8″ to 5-7/8″ | Taller cabinet bases and specialty designs |
| 450-15-TT | 5-3/4″ to 6-3/4″ | 6-inch toe kicks and elevated cabinetry |
Each range provides 1 inch of adjustment. Choose a model that covers the required finished cabinet height and leaves enough travel to correct uneven floors.
For example, a cabinet designed around a 4-inch toe kick may use the 450-10-TT model, which adjusts from 3-3/4 inches to 4-3/4 inches.
If a project requires more clearance, select a taller model rather than extending a shorter leg beyond its rated range.
Available at Würth Louis & Company:
- 450-10-TT: 3-3/4″ to 4-3/4″ Smile Leveler
- 450-11-TT: 4-1/8″ to 5-1/8″ Smile Leveler
- 450-13-TT: 4-7/8″ to 5-7/8″ Smile Leveler
- 450-15-TT: 5-3/4″ to 6-3/4″ Smile Leveler
How Many Leveling Legs Does Each Cabinet Need?
Four leveling legs are a common starting point for a standard base cabinet, with support near each corner.
Larger cabinets, heavy countertop loads, and long cabinet runs may need additional support points. Check the cabinet design and expected load before setting the final quantity.
Do not assume that four legs automatically give every cabinet a rated capacity of 1,320 lbs. The complete installation, weight distribution, and cabinet construction also affect safe support.
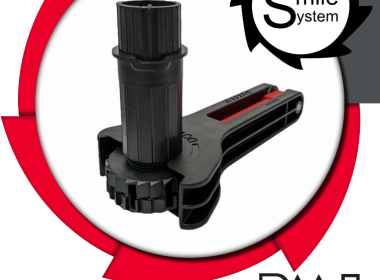
3. Smile Adjustment Tool: Make Leveling Faster
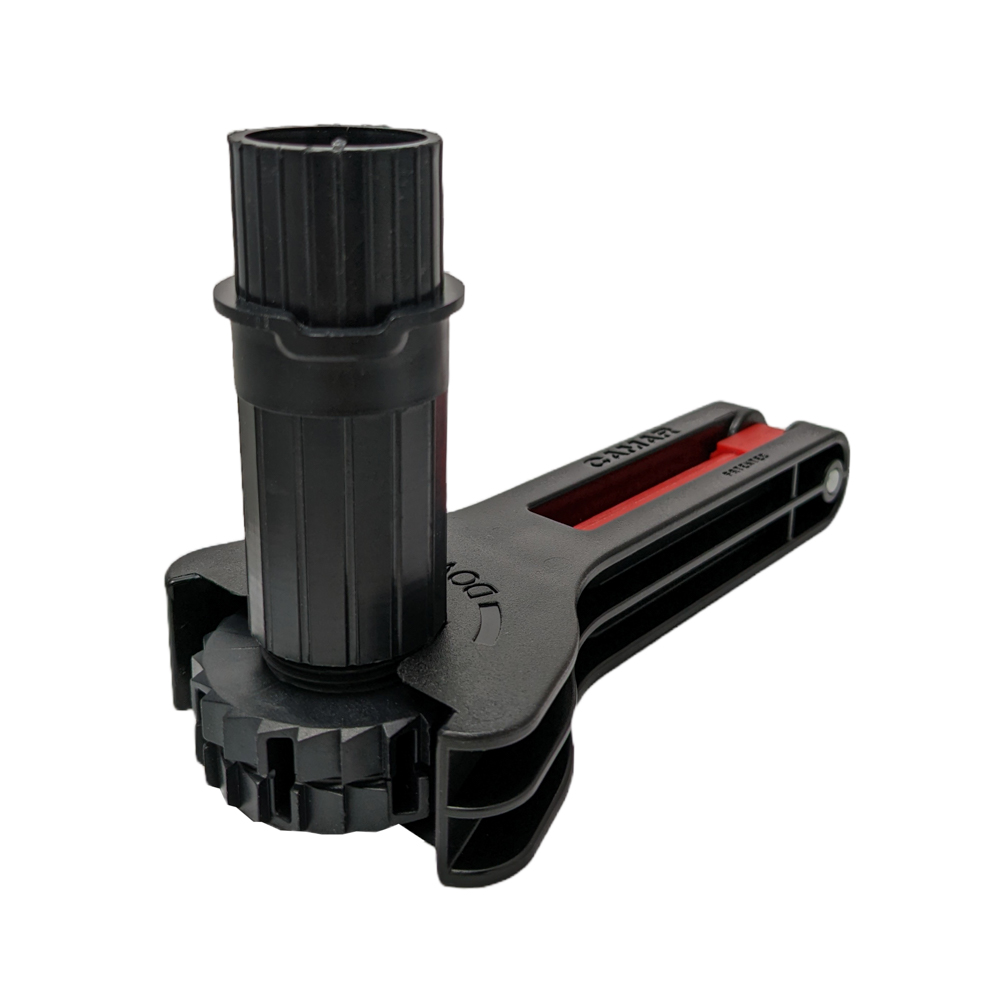
The Smile System Adjustment Tool is the feature that sets Smile apart from a standard threaded cabinet leg.
The tool engages the patented foot design and uses a ratcheting action to adjust cabinet height.
Its two-sided design makes changing direction simple:
- Position the tool around the leveling foot.
- Use the side marked UP to raise the cabinet.
- Rotate the tool 180 degrees to select DOWN when you need to lower it.
- Continue adjusting until the cabinet reaches the desired height.
This process lets installers make small height corrections from beneath the front of the cabinet without repeatedly reaching under it to turn the foot by hand.
For frameless cabinetry, precise leveling is especially important. Small changes in cabinet alignment can affect door reveals, drawer front alignment, and the appearance of a finished run.
The Smile adjustment tool helps crews establish a level cabinet base before making final door and drawer adjustments.
Buying Tip: Order at least one adjustment tool for each installation crew. The tool is sold separately from the leveling legs.
4. Extension Handle: Reach Rear Cabinet Legs
Front leveling legs are usually easy to reach. Rear legs can be more challenging, especially in deep base cabinets and corner installations.
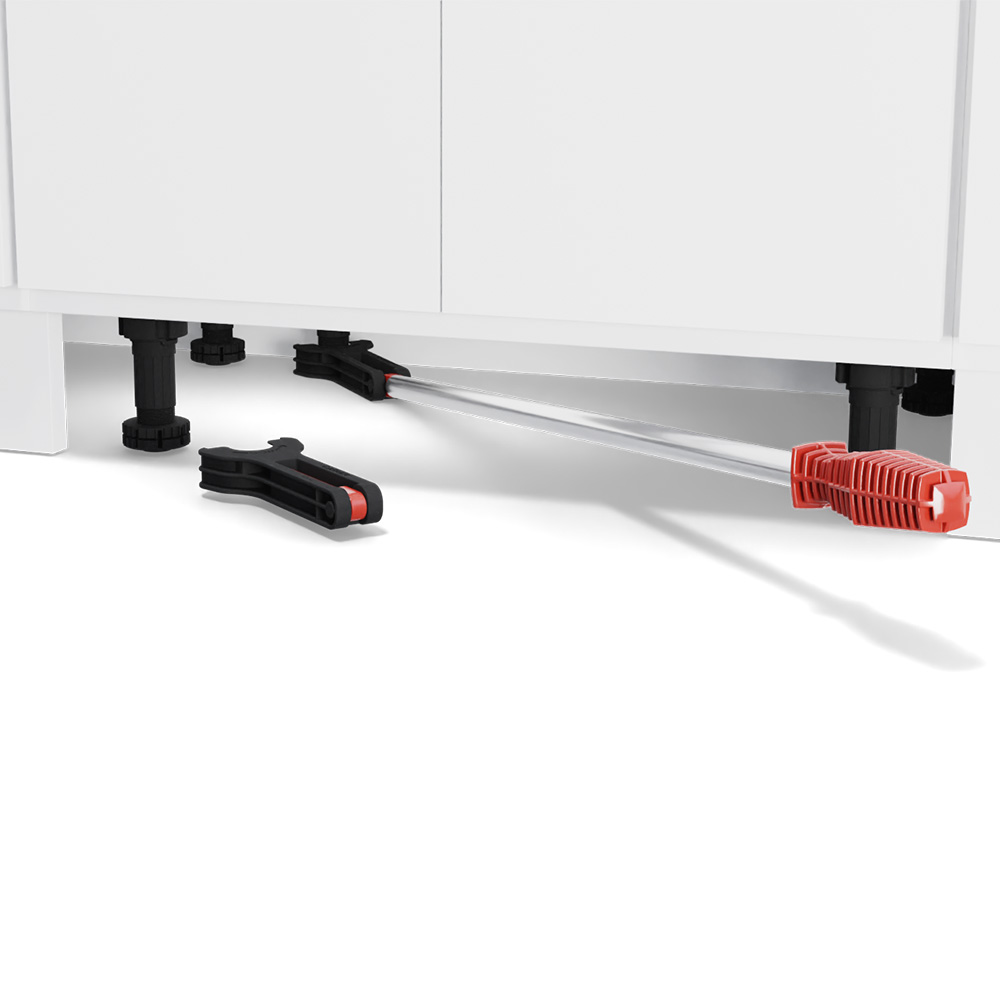
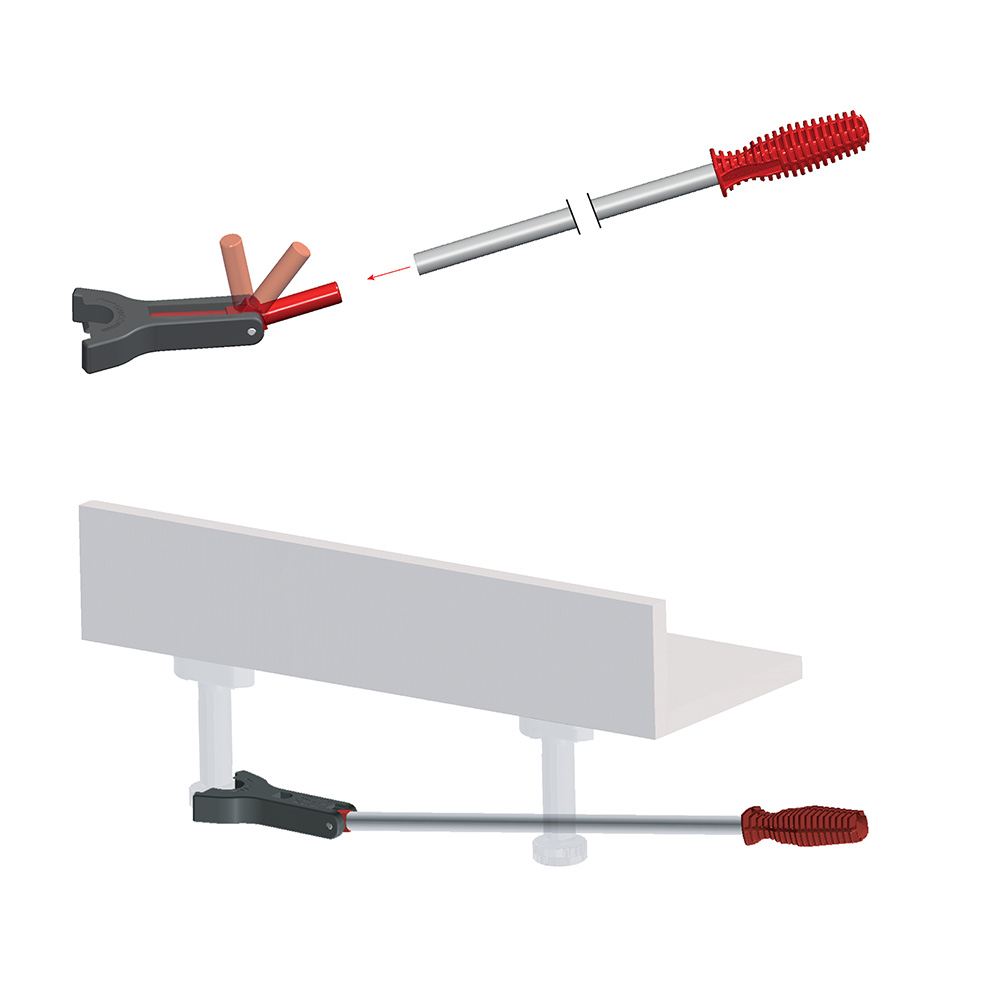
The Smile System Aluminum Extension Tool solves that access problem.
The extension features:
- A 23-5/8-inch aluminum shaft
- A 28-inch overall length
- A red ABS handle
- A connection designed for the Smile adjustment tool
The adjustment tool has a retractable adapter that connects to the extension handle. A twist-lock connection helps keep the tools attached during use.
With the extension installed, the crew can reach rear leveling legs from the front of the cabinet instead of working deep underneath it.
This is especially useful for standard 24-inch-deep base cabinets, corner cabinets, and wider installations where access is limited.
Buying Tip: The extension is not a standalone adjustment tool. You need the 809-48-TT adjustment tool to use it.
5. Compatible Toe Kick Clips: Finish the Cabinet Base
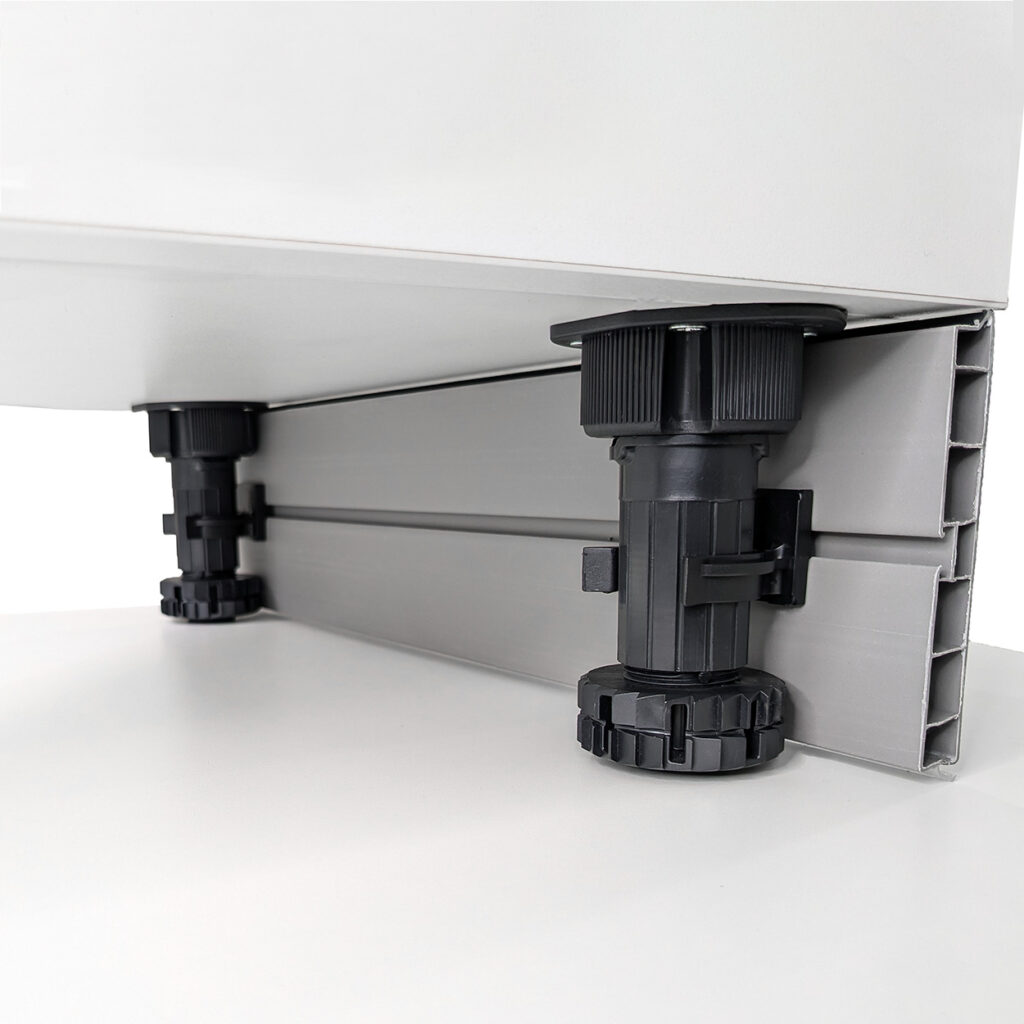
Once the cabinets are level, toe kick clips connect the finished toe kick panel to the leveling legs.
These clips allow installers to attach the toe kick without making it a permanent part of the cabinet.
That provides two practical benefits:
- Installers can remove the toe kick to access plumbing, wiring, or other services beneath the cabinets.
- A damaged toe kick can be removed and replaced without automatically replacing the cabinet above it.
Peter Meier offers compatible clips for wood, plastic, and aluminum toe kicks. The correct choice depends on how the clip mounts to the toe kick panel.
Two-Finger vs. Four-Finger Toe Kick Clips
| Clip | Würth Louis & Company Item Number | Mounting Style |
|---|---|---|
| 2-Finger Screw Mount | PT228S | Screws to the toe kick panel |
| 2-Finger Groove Mount | PT228G | Fits a compatible 4mm groove |
| 4-Finger Screw Mount | PT202V1T2 | Screw-mounted four-finger connection |
| 4-Finger Groove Mount | PT202ANC2 | Four-finger connection for a compatible groove |
Both two-finger and four-finger clips are available for Peter Meier cabinet levelers. Choose the design based on the toe kick panel, its mounting details, and the required connection.
For traditional wood toe kicks, screw-mounted clips offer a practical option. For panels with a prepared mounting groove, select the matching groove-mounted clip.
Peter Meier also offers adhesive-mounted clips and specialized twist-lock, slide-nut, and end-feed options for compatible toe kick extrusions.
Why Removable Toe Kicks Matter
Removable toe kicks make future service easier.
For example, a cabinet run may conceal plumbing lines or electrical wiring beneath the cabinet boxes. With a clip-mounted toe kick, a technician can remove the panel to gain access.
Plastic or PVC toe kick panels can also provide better resistance to routine floor moisture than unfinished wood. Combined with raised cabinet boxes, the Smile system helps reduce direct exposure to water during cleaning or minor spills.
The leveling system is not waterproof protection for the full cabinet, however. Leaks and standing water can still damage cabinetry and surrounding materials.
How the Smile System Works During Installation
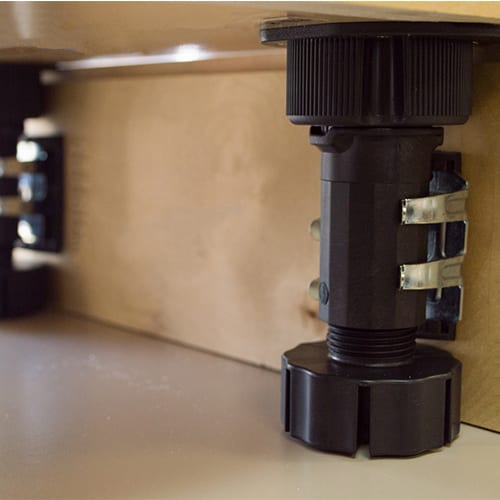
Once you have the right components, the installation follows a straightforward process.
Step 1: Install the Mounting Sockets
Secure the selected sockets to the cabinet bottom using the required drilling or fastening method.
For repeat production, complete this step in the cabinet shop.
Step 2: Insert the Leveling Legs
Insert each Smile leveler into its compatible socket.
Smile levelers come preset to a starting height from the factory, helping installers begin from a consistent position.
Step 3: Position and Level the Cabinets
Establish the finished cabinet height with a laser level.
For an L-shaped cabinet run, begin with the corner cabinet. Bring it to level, then work outward as you position and connect the remaining cabinets.
Step 4: Adjust Front and Rear Legs
Use the Smile adjustment tool to raise or lower the front legs.
Attach the extension handle when you need to reach rear or corner legs.
Check the cabinet position as you work so the full run remains level and properly aligned.
Step 5: Install the Toe Kick
Once the cabinets are secure and level, attach the selected clips to the toe kick panels.
Snap the panels onto the leveling legs and check their fit against the floor and adjoining panels.
The result is a clean, removable toe kick and a cabinet run ready for final finishing.
Is the Peter Meier Smile System Right for Your Shop?
The Smile system is a strong fit for cabinet shops and installers that want repeatable leveling without relying on site-built bases and repeated shimming.
It is especially useful for:
Professional Kitchen Cabinet Shops: Fine height control helps installers align frameless cabinet runs and maintain consistent door reveals.
Production Cabinet Manufacturers: Preinstalled sockets and separately packed legs can make cabinet assembly, shipping, and jobsite setup more efficient. Removing the traditional toe kick notch can also improve sheet yield during CNC nesting.
Bathroom and Closet Installers: Adjustable legs help crews deal with uneven floors and different base heights.
Garage and Specialty Cabinet Builders: Taller leg options provide added floor clearance for projects that need an elevated cabinet base.
Cabinet Installers Working on Uneven Floors: The front-operated adjustment tool and extension reduce the need for repeated manual adjustments beneath the cabinet.
For shops that install base cabinets regularly, the biggest advantage is not just the leveling leg itself. It is the way the sockets, adjustable legs, and tools work together to simplify the installation process.
Final Takeaway: Order the Complete Smile System
The Peter Meier Smile Cabinet Leveling System gives professional cabinet shops a practical way to improve leveling speed, cabinet alignment, and installation consistency.
Start with one compatible socket and one Smile leveling leg for every support point. Select the correct height range, add the adjustment tool, and include the extension handle for easier access to rear legs.
Finish the system with toe kick clips that match your chosen panel material and mounting method.
When you order the right components together, your crew can spend less time correcting uneven floors and more time completing the cabinet installation.
Shop Peter Meier Cabinet Leveling Components at Würth Louis & Company