An organized kitchen doesn’t just look better, it works better. When cabinets are cluttered, meal prep becomes a scavenger hunt. But with a clear plan, you can turn that chaos into calm.
The process starts with emptying and sorting, then cleaning and categorizing what remains. From there, you’ll arrange items by frequency of use and add smart storage tools that make every inch count.
Follow these ten simple steps to transform your kitchen cabinets into efficient, stress-free spaces where everything has a place.
TLDR; How to Organize Your Kitchen Cabinets
- Clear, clean, and categorize items before returning them to cabinets
- Place everyday items at eye level and seldom-used items on higher shelves
- Use organizers and dividers to maximize space efficiency
1. Empty and Sort Contents
The first step in any cabinet organization project is to empty everything out. This gives you a clean slate to work with and helps you see exactly what you have. Remove all items from your cabinets and place them on a clear countertop or table.
Once everything is visible, sort your items into three main categories: keep, donate, and recycle. Be honest with yourself about what you actually use. That pasta maker you haven’t touched in five years? The chipped plates you keep pushing to the back? Now is the time to make decisions about what deserves space in your kitchen.
Decision-Making Questions
When deciding what to keep, ask yourself:
- Have I used this item in the past year?
- Is it in good working condition?
- Do I have duplicates that serve the same purpose?
- Would I buy this again today?
For items you’re keeping, create subcategories based on use: everyday items, specialty items, and seasonal items. This preliminary sorting will guide your placement decisions later.
2. Clean and Assess Space
With empty cabinets, you have the perfect opportunity to give them a thorough cleaning. Wipe down all interior surfaces with an appropriate cleaner for your cabinet material. Pay special attention to corners and edges where crumbs and dust collect.
While cleaning, inspect your cabinets for any damage or wear. Check for loose hinges, damaged shelves, or areas that need repair. Making these fixes now ensures your organization system starts on a solid foundation.
After cleaning, measure your cabinet dimensions. Note the height, width, and depth of each cabinet, as well as the distance between shelves. These measurements will be crucial when selecting organization tools or adjusting shelf heights.
Shelf Liner Considerations
Consider adding shelf liners for:
- Protection against scratches and moisture damage
- Easier cleaning in the future
- Preventing items from sliding around
- Adding a decorative element to cabinet interiors
Non-adhesive liners are generally easier to clean and replace than adhesive options. Choose liners appropriate for your specific needs—non-slip for glassware shelves, waterproof for under-sink areas.

3. Categorize and Group Items
Now that your cabinets are clean and your items sorted, refine your groupings. Place similar items together based on function, frequency of use, and logical workflow in your kitchen.
Common kitchen groupings include:
- Stackable shelves that create new levels within tall cabinets
- Hooks on the sides of cabinets for hanging measuring cups or utensils
- Vertical dividers for storing baking sheets, cutting boards, and trays
- Under-shelf baskets that utilize the space between shelves
- Cooking tools (pots, pans, bakeware)
- Food preparation items (mixing bowls, measuring cups)
- Dishware (plates, bowls, glasses)
- Food storage containers and lids
- Small appliances
- Pantry items (organized by type)
For smaller items that tend to get scattered, consider containerizing. Small bins or baskets keep like items together and prevent them from getting lost in the back of cabinets.
Smart Containerizing Strategies
Effective containerization requires thinking about how you use items:
- Group measuring spoons and cups in a single container
- Keep baking supplies (extracts, food coloring, decorating tools) in one basket
- Store small appliance attachments together in labeled containers
- Use clear containers whenever possible to easily see contents
Remember that the goal isn’t just neatness—it’s creating a system that makes your kitchen work better for you.
4. Strategic Placement
Where you place items in your cabinets can significantly impact your kitchen efficiency. The general rule is to store items close to where you’ll use them and according to how often you use them.
Store seldom-used items like holiday serving platters or specialized cooking equipment on higher shelves or in hard-to-reach cabinets. These might include turkey roasters, large punch bowls, or appliances you use only occasionally.
Place everyday items at eye level or lower for easy access. These include:
- Daily dishware and glasses
- Frequently used cookware
- Common food staples
- Coffee supplies (if you’re a daily coffee drinker)
Zone-Based Organization
Consider organizing your cabinets by kitchen zones:
- Prep zone: Store cutting boards, knives, and mixing bowls near your main prep area
- Cooking zone: Keep pots, pans, and cooking utensils near the stove
- Serving zone: Place plates, bowls, and serving pieces near the dining area or dishwasher
- Storage zone: Keep food storage containers near where you pack leftovers
This zone approach minimizes the steps needed to complete kitchen tasks and creates a natural workflow.

5. Use Organizers and Dividers
Cabinet organizers transform chaotic spaces into orderly systems. These tools maximize your cabinet space and keep items accessible.
Some essential organizers include:
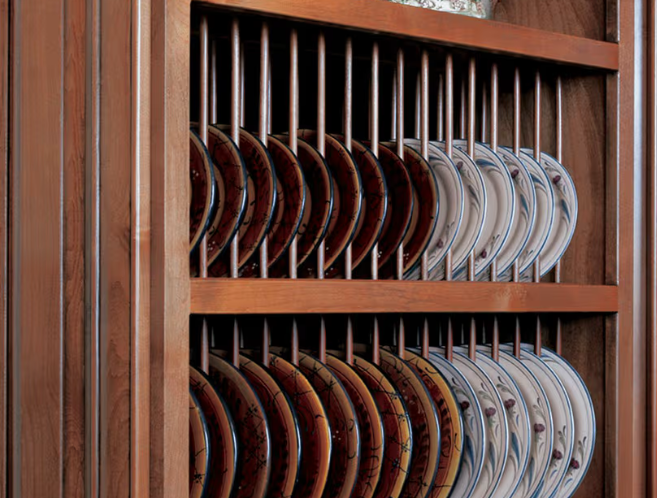
- Plate racks to store dishes vertically and prevent chipping
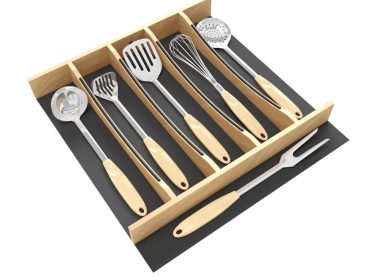
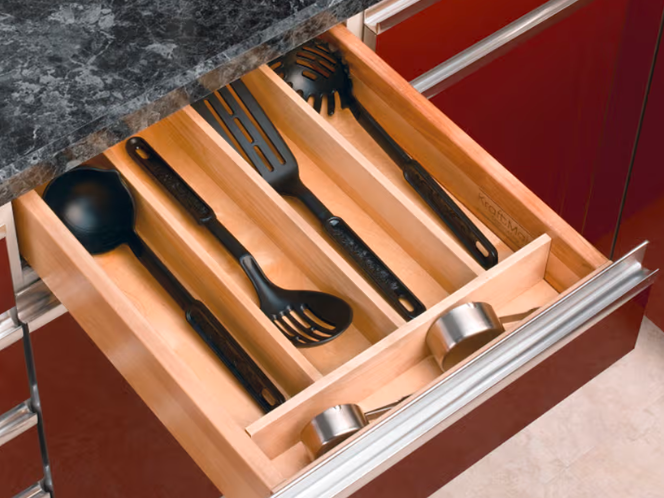
- Drawer dividers to separate utensils and cooking tools
- Spice racks that allow you to see all spices at once
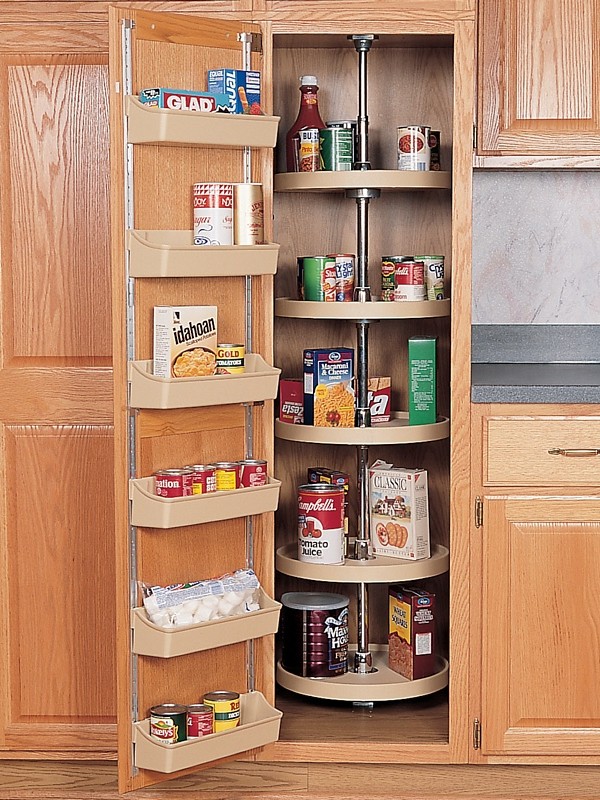
- Lazy Susans for corner cabinets, making items in the back accessible
- Shelf risers to create additional vertical storage
For corner cabinets, which often become black holes for kitchen items, lazy Susans are particularly valuable. They rotate to bring items from the back to the front, eliminating the need to reach into deep corners.
Choosing the Right Organizers
When selecting organizers, consider:
- Measurements of your cabinets (width, depth, height)
- Material durability (look for sturdy materials that won’t warp or break)
- Adjustability (expandable organizers offer flexibility)
- Ease of cleaning (removable parts are easier to maintain)
Invest in quality organizers that will stand up to regular use. Budget-friendly options like tension rods and basic shelf dividers can be surprisingly effective for simple organization needs.
6. Implement Vertical Storage Solutions
Vertical space in cabinets is often underutilized. Maximizing this dimension significantly increases your storage capacity without requiring additional cabinet space.
Try these vertical storage solutions:
For cookware, consider storing pots and pans with their lids separate to save space. Lid organizers can be mounted inside cabinet doors or placed in drawers to keep lids accessible but compact.
Cookware Storage Options
When organizing cookware, you have several options:
- Stacking with protectors between pieces to prevent scratching
- Nesting smaller pots inside larger ones
- Using racks that store pots and pans on their sides
- Hanging frequently used pieces on wall-mounted racks (if cabinet space is limited)
Choose the method that best fits your cookware collection and kitchen setup.
7. Designate Food Storage Areas
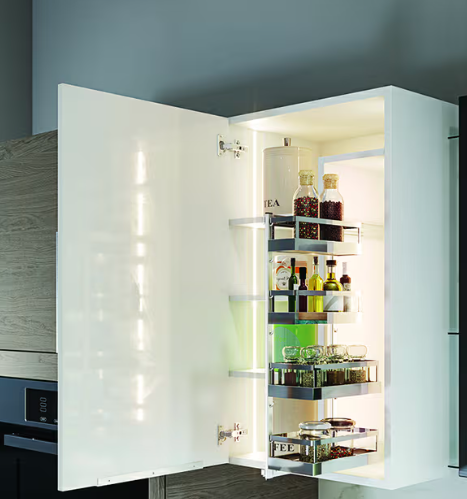
Food items require special organization strategies. Proper food storage organization helps prevent waste and makes meal preparation more efficient.
When organizing food in cabinets:
- Group similar items together (grains, canned goods, snacks, baking supplies)
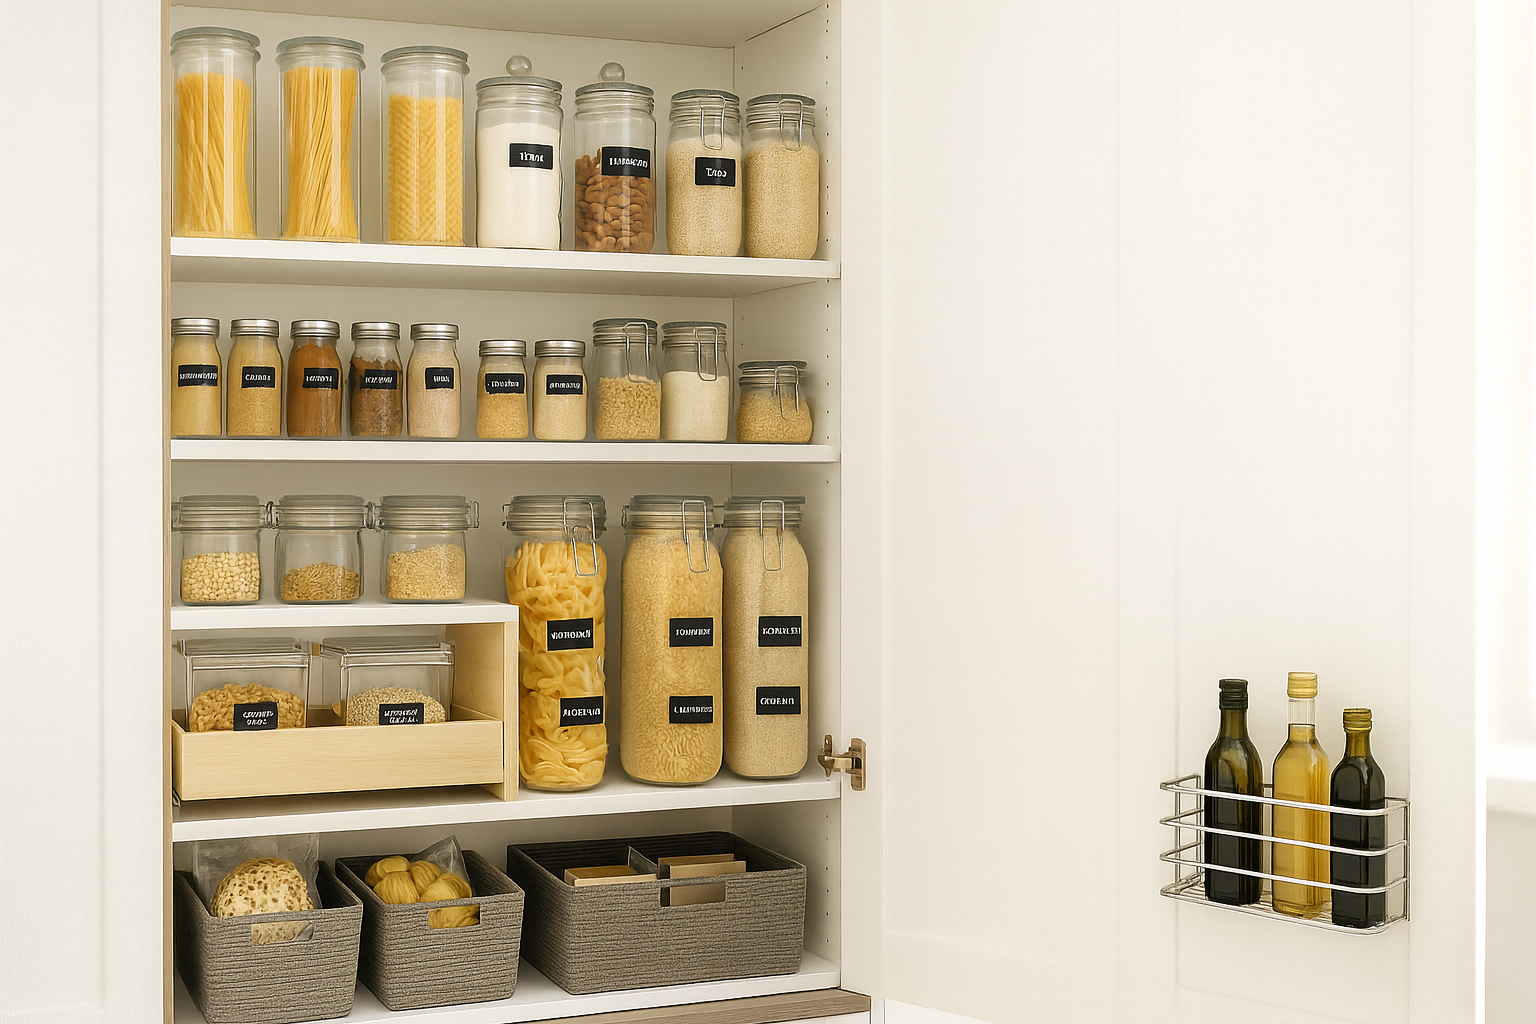
- Use clear containers for bulk items like flour, sugar, and rice
- Implement a “first in, first out” system, placing newer items behind older ones
- Consider the weight of items—heavier items should go on lower shelves
The question of whether food should go in upper or lower cabinets depends on your kitchen layout and personal preferences. Generally, everyday pantry items work well in upper cabinets at eye level, while heavier items like canned goods may be better suited for lower cabinets.
Pantry Organization Tips
For cabinet pantry spaces:
- Label containers clearly with contents and expiration dates
- Use tiered shelves or risers so you can see items in the back
- Store frequently used ingredients at eye level
- Consider door-mounted racks for spices or small packaged items
- Rotate stock regularly to prevent food waste
Clear containers not only look neater but also allow you to quickly assess when supplies are running low.
8. Address Problem Areas
Most kitchens have challenging storage areas that require creative solutions. Identifying and addressing these problem areas is key to comprehensive cabinet organization.
Common problem areas include:
- Deep corner cabinets (solution: corner pull-outs or lazy Susans)
- Narrow cabinets (solution: slide-out organizers or specialized narrow shelving)
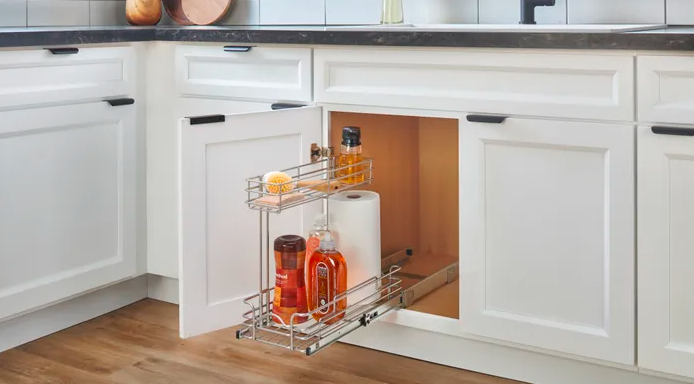
- Under-sink spaces with plumbing (solution: adjustable shelving that works around pipes)
- Tall cabinets with wasted vertical space (solution: additional shelving or stackable containers)
For cabinets that are particularly deep, consider pull-out drawers or baskets that bring items from the back to the front. These prevent items from being forgotten in the depths of your cabinets.
Under-Sink Organization
The under-sink area presents unique challenges:
- Measure around pipes and disposal units before purchasing organizers
- Use stackable, slide-out bins that can work around plumbing
- Consider a tension rod to hang spray bottles
- Look for waterproof mats to protect the cabinet from leaks
- Mount small items like sponges or brushes on the cabinet door
With the right organizers, even these challenging spaces can become functional storage areas.
9. Label Everything
Labeling is the secret to maintaining your newly organized cabinets. Labels serve multiple purposes: they help you find items quickly, remind everyone where things belong, and make it easier to maintain your system.
- Adhesive labels for containers and bins
- Chalkboard or dry-erase labels for items that change frequently
- Cabinet shelf labels for indicating what goes where
- Color-coded systems for different categories or family members
Consider these labeling options:
For households with multiple members, clear labeling helps everyone participate in maintaining organization. It eliminates guesswork about where items should be returned after use.
Sustainable Labeling Approaches
For a more sustainable approach to labeling:
- Use washable labels that can be reused
- Consider wooden or other durable tag options
- Invest in a label maker for consistent, professional-looking labels
- Use pictures or symbols for households with young children or non-readers
Remember that the goal of labeling is clarity and ease of use—choose a system that works for your household’s needs.

10. Maintain and Adjust Your System
The final step in cabinet organization is ongoing maintenance. Even the best organization system will fail without regular upkeep.
Establish these maintenance habits:
- Return items to their designated places after use
- Schedule quarterly “touch-up” sessions to address any creeping disorder
- Reassess your system periodically and make adjustments as your needs change
- Clean cabinets and organizers regularly to prevent buildup of dust and crumbs
Be willing to adapt your system if you find certain aspects aren’t working. Organization should make your life easier, not create additional stress through rigid rules.
The Six-Month Review
Every six months, conduct a more thorough review of your cabinet organization:
- Remove everything from one section at a time
- Clean the cabinets thoroughly
- Evaluate if items are still being stored in the most logical places
- Check if any organizers need replacement
- Consider if any items haven’t been used and could be donated
- Make adjustments based on changing household needs or habits
This regular review keeps your system fresh and functional, adapting to your evolving kitchen needs.
Final Thoughts: How to Organize Kitchen Cabinets
A well-organized kitchen with thoughtfully arranged cabinets transforms daily cooking from a stressful experience into an enjoyable activity. By following these ten steps, you create a kitchen that works for you rather than against you. The time invested in organization pays dividends in time saved, reduced stress, and even potentially reduced food waste through better visibility of what you have on hand.
